Monday, April 27, 2009

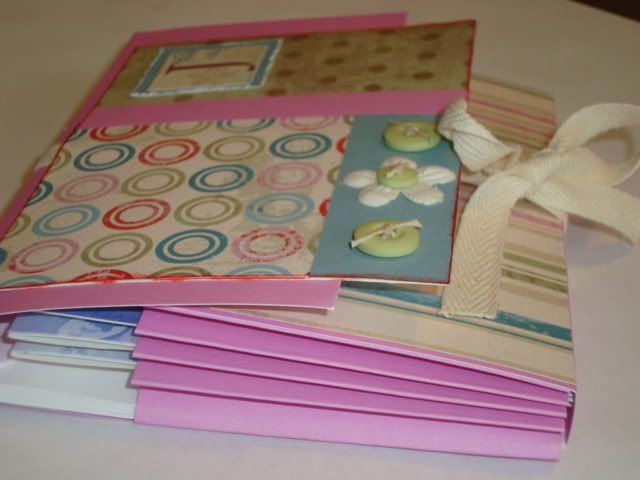
Card Folio

As promised, here's another simple, inexpensive gift idea for family and friends that will show them your appreication.


Here's how to make it:
Step 1:
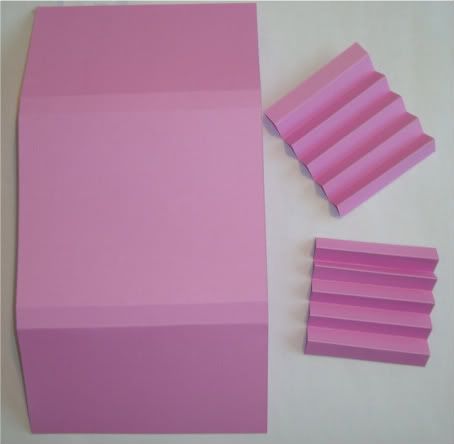
Cut cardstock to 11-1/2 x 5-3/4. Cut two additional pieces of cardstock to 3 x 5
Step 2:
Larger piece of cardstock-Score (with the 11-1/2 edge at the top) at 3", 3-1/2", 8" and 8-1/2". Fold on score lines.

Smaller piece of cardstock-Score at every 1/2". Accordion fold on score lines.

The following picture should give you the idea


Step 3:
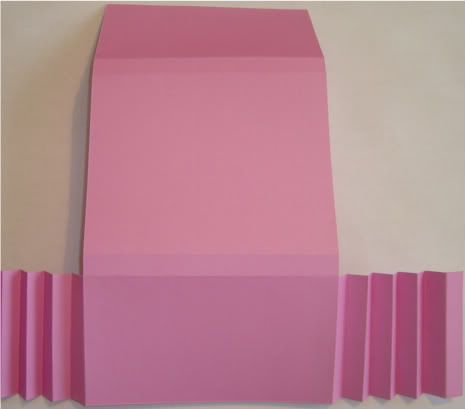
Next you'll attach the accordion pieces to either side of the folios front edge.


Step 4:
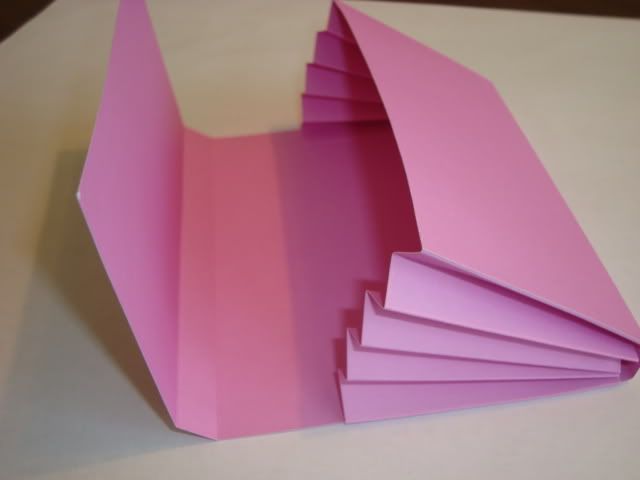
Attach the other side of the accordion piece to the back of the folio. This will make your accordion pocket for your five cards to fit into.

Step 5:
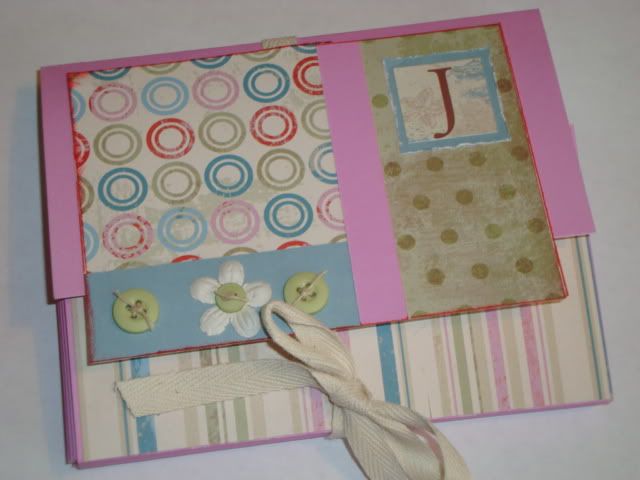
Decorate.
All materials used are Close To My Heart.

Tuesday, April 14, 2009

S. O. S. - Save Our Scrapbooks...

I was flipping through my May/June issue of Simple Scrapbooks and saw the Editor's Note from Stacy Julian titled A Simple Farewell. At first I thought Stacy was moving on to pursue another book showing us how to make a mini album in a weekend. But the farewell she was speaking of is the farewell of Simple Scrapbooks magazine. I have gleened many ideas from the pages of this publication and I'm sorry to see it go like so many other newspapers and magazines. I will continue to get tips and tricks from Creating Keepsakes, big-sister publication to SS.

Scrapbooking is one of the many hobbies I enjoy (not as much as the homebaked treats I make, but definitely more than exercising - although I always feel strong and accomplished after a meaningul workout). It is very gratifying when my children pour over pictures in our albums commenting about how cute they were (they WERE and still are in my opinion). So, to save our scrapbooks I'm challenging you to spend a couple of hours one day this week to preserve your memories; whether you're a digi-scrapper or the traditional type with paper and glue like me. And get out from behind the camera so that YOU are in some of those photos too.

If you're at a loss for time or don't know how to get started, join me for a crop on National Scrabooking Day, Saturday May 2nd from 1-11 p.m. For $15 you'll get your own workspace, limited interruptions, a mini album class, access to my stamps & inks and "how-to" books, and a Mexican fiesta (it's close enough to Cinco de Mayo, right?). You'll also get a gift from me, as well as chances at other prizes. Seating is limited so RSVP right away.
Friday, April 10, 2009

My little crafty protoge

As the saying goes..."the apple doesn't fall far from the tree." My 6 year-old loves to color, draw, paint, cut, glue, staple, you name it. She's a crafty one.

This week in school, the children were given pre-printed cardstock to make place cards for Easter dinner. Hailey followed directions, coloring the basket and cutting only on the basket line, not the dotted, fold-here line, to make a cute little place card for me.

Then she came home and proceeded to make her own creative place cards for the rest of the family. Aren't they adorable?

Happy Easter everyone. Take a moment to give thanks for this life that God has blessed you with and to evaluate what you are doing to give back.

Tuesday, April 7, 2009

Inexpensive Paper Craft Ideas

As promised in my newsletter, this month I am posting some creative ideas for inexpensive gifts for teachers, mom and grads. (Post a message if you'd like to receive my newsletter.)


Today's idea is a Coaster Clip Board. You'll need a heavyweight coaster to start with. Restaurants like Chili's may be give you a few coasters if you ask them.

  • Cut printed paper to fit the size of coaster you are using and then adhere to the coaster. I like using Bonding Memories glue from Close To My Heart. If you are using printed coasters from a restaurant, you will want to cover both sides of the coaster with decorative paper.
  • Sand the edges of the coaster (tip - sand 'down' towards the edge so the paper does not pull up).
  • Attach sticky notes to the decorated coaster and secure in place with a 1-1/4" binder clip.
    You can decorate the binder clip with coordinating paper (1-1/4" x 3/4"). Adhere the paper to the clip with Tombow adhesive or similar two sided tape runner.
  • Use ribbons, paper flowers, sparkles, etc. to jazz up your Coaster Clip Board.


Let me know how yours turns out.